Syncing MinIO with Ceph object storage
Hello guys, Erfan is back with another article, my very first 2023 post!
This time, imma talk about syncing two nowadays famous open-source object storage systems, MinIO and Ceph.
Let’s begin with a brief of each, first MinIO:
MinIO is a High Performance Object Storage released under GNU Affero General Public License v3.0. It is API compatible with Amazon S3 cloud storage service. It can handle unstructured data such as photos, videos, log files, backups, and container images with the maximum supported object size of 5TB.
And Ceph:
Ceph is an open-source software-defined storage platform that implements object storage on a single distributed computer cluster and provides 3-in-1 interfaces for object-, block- and file-level storage.
So far we know that the MinIO is focused on Object Storage and doesn’t support any other storage type but on the other hand, Ceph is supporting 3 storage types, Object Storage, Block Storage, and File Storage.
If the MinIO says that it doesn’t support Block Storage and File Storage, it’s obvious to us that it can’t be integrated with Ceph. But let’s talk about how we can sync the only storage system we have here, the “Object Storage”.
Replication
Both MinIO and Ceph APIs are S3-Compatible which means they implement the same rules and conventions as the AWS S3 service. By benefiting from this integrity, we can sync our objects in both systems. MinIO internally introduces two methods for replicating data, Site Replication, and Bucket Replication.
Site Replication is a feature that lets you integrate two independent MinIO deployments. In this manner, MinIO syncs Policies, Users, Groups, Access Keys, and Policy Mappings with the other deployments. Unfortunately, this method doesn’t work for Ceph at all and it only works for Minio instances. I have tested it by myself and it’s true. So trust me and let's pass to the other method, the Bucket Replication!
Bucket Replication will only replicate objects of a bucket to the peer that you define. Since it transfers objects only (not the MinIO instance data), it’s supposed to work with Ceph and it does, but, in my testing, it turned out that it isn’t stable enough. I’ll discuss it later on but let’s see how we can create a new replication rule for now.
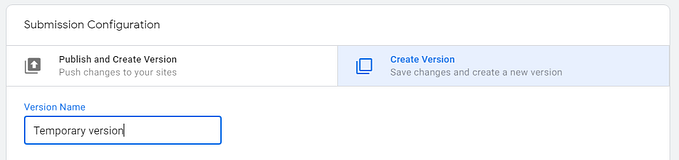
In the MinIO web console, you should navigate to the buckets list, click on your desired bucket’s Manage button and select the Replication tab. On this page, click on Add Replication Rule to set a new one.

By providing your Target URL and your Keys, a new bucket replication rule will be created. Once it’s created, the status of the replication will be shown which would be Enabled if the connection is established correctly. Remember that you can enable Bucket Replication for only those buckets that have Versioning enabled.
Bucket Replication Instability
While MinIO Bucket Replication works pretty well with another MinIO instance, it doesn’t get along with Ceph. Let me explain why.
Before proceeding to my experience, MinIO on its documentation states that:
MinIO server-side bucket replication only supports MinIO clusters for the remote replication target.
After reading this line, I was like “Ops! I suppose it wouldn’t work with Ceph too, but let’s give it a try”.
I had a scenario where I tested the basic functionality of Bucket Replication with Ceph. I deployed a new single-drive / single-node MinIO instance and created a testing bucket with the Versioning option enabled. Then I created the same bucket on my Ceph cluster and defined my replication rule withmc client (MinIO Client) which is way way more efficient than the Web Console UI. I wouldn’t suggest working with UI for anything rather than exploring the bucket objects.
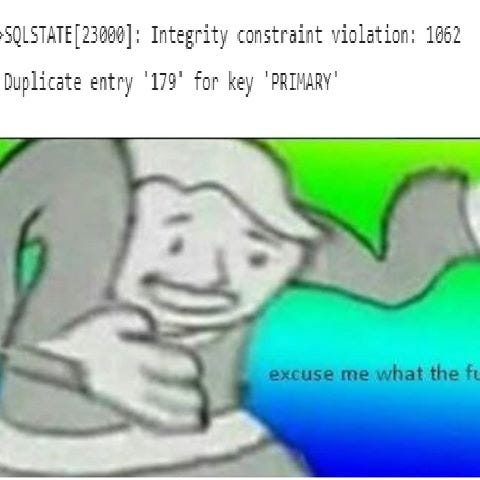
After having the replication rule set, I tried to upload a new object to the bucket. Boom! Object uploaded successfully on Minio and replicated immediately on the Ceph bucket. Both services could serve the file through the API correctly. Then, I tried to remove it from the source bucket with mc rm . The object was removed from the source MinIO bucket successfully but it was still alive in the target Ceph bucket. I waited a couple of minutes to observe any changes in the target bucket but I saw no difference and the deleted object never got removed. So as a result, I considered it a non-working solution for a production environment.
Object Mirroring
MinIO client mc has a command called mc mirror which works perfectly with any other S3-compatible storage, it can be a MinIO, Ceph, or Amazon S3. This command can watch all changes that are being made to a source bucket and do the same changes on the target. It’s kind of rsync but for buckets.
The disadvantage of this approach is that it cannot copy the objects’ history and metadata, as the documentation notes:
mc mirroronly synchronizes the current object without any version information or metadata. To synchronize an object’s version history and metadata, consider usingmc replicateormc admin replicate.
If you don’t care about the metadata and versions, you are good to continue. But if you do, this is the end of the line for you. There is no other way for doing so. But for now, let’s proceed to see how we can use mc mirror .
First, define your aliases with mc alias set command:
mc alias set miniosrc https://myminio.example.net username password
mc alias set cephtrgt https://myceph.example.net access-key secret-key
Once you have your aliases defined, you can use the mc mirror to copy the existing data from miniosrc to cephtrgt:
mc mirror miniosrc/testbucket cephtrgt/testbucketBy issuing the above command, the MinIO client starts to copy objects that are not present on the target and it terminates when all files are copied. If you want to keep it running and copy newly uploaded files too, pass the — watch flag to the mirror command:
mc mirror --watch miniosrc/testbucket cephtrgt/testbucketThe mirror command accepts some other useful flags such as --overwrite and --md5 that you can find the explanation of each one in this link. If you want to make sure that the mirror process is always running, you can deploy the mc client as a container to your Kubernetes cluster (that will be rescheduled when it goes down) or simply keep it running with a Supervisor config on a Linux server.
That’s it! As always, if this article helped you along, please give it a clap (or even more!).
Happy Replicating!


![[Part 1] DIY globally accessible S3 compatible object store](https://miro.medium.com/v2/resize:fit:679/1*uxXKnAKa6RAvRiLTa0fJFg.png)